Independent Final Project
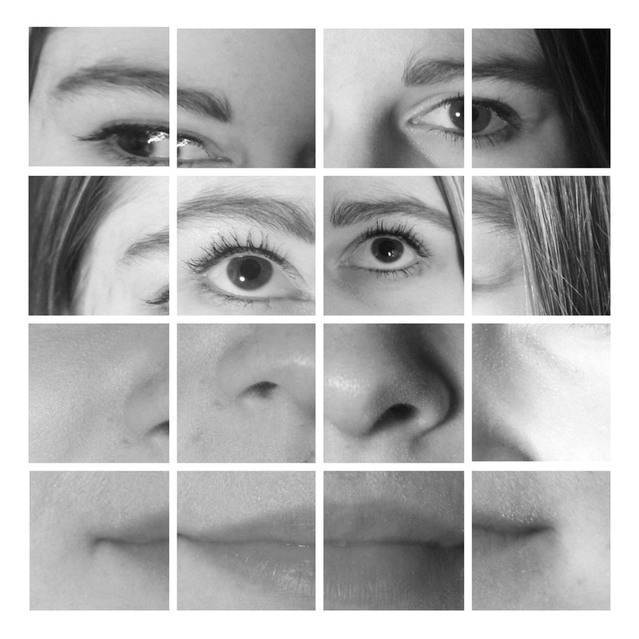
I finally completed my final project. It took me forever to come up with an idea for my final project. I didn’t know what I actually wanted to do. I don’t really like it when I get so much freedom into doing whatever I want to do; I go into panic mode and end up not doing anything. But for this project I didn’t really go into panic mode. I went on pinterest and was looking at some photos to get some inspiration. Then from last year I remember doing a project called Picasso’s Revenge. I found that the concept of that was really fun and interesting but I wanted to do something different. So I made it in a different way. I had to re-take these photos in the studio because I didn’t like the first set of photos I got. I wanted it to look neat and organized yet confusing. I probably took 50 photos and then I picked 16 photos that I really liked and that would go with each other. I made the first two rows focusing on her eyes and eyebrows because I think that’s one of the most significant features you have on your face. Then I went in order and did the mid section of her face and then her lips. Before I turned all of the photos black and white all of the photos had different lighting and different amounts of exposure. I liked how it turned out when I put it into black and white because all squares don’t look the same. Each square is different. I wanted to put a white border around it to make it look more functional in a sense where the pictures are easier to define. My favorite thing about this project would have to be how all of the photos are going everywhere but at the end it all makes sense. It reminds me of a puzzle that has all of its puzzle pieces in the wrong place. Overall I enjoyed working on this project and I was glad I got to end the year with a project of my choice.
Stanley Park
When we had gone to our field trip to Stanley Park it was a very eventful day. Along the way there we got lost multiple times but we captured each and every moment. The 11 photos I choose to edit were the photos that I think stood out to me the most. I didn’t spend much time editing them because I really wanted the photo to look itself. I really liked how we had so much freedom into taking photos of whatever we wanted and there was so much to take off because it gets annoying to wonder around the school to try to find photos to take. One thing that made it easier to take photos was that the weather. Since it was cloudy it was easier to take photos.
Contemporary Photographer
I finally completed my final project. It took me forever to come up with an idea for my final project. I didn’t know what I actually wanted to do. I don’t really like it when I get so much freedom into doing whatever I want to do; I go into panic mode and end up not doing anything. But for this project I didn’t really go into panic mode. I went on pinterest and was looking at some photos to get some inspiration. Then from last year I remember doing a project called Picasso’s Revenge. I found that the concept of that was really fun and interesting but I wanted to do something different. So I made it in a different way. I had to re-take these photos in the studio because I didn’t like the first set of photos I got. I wanted it to look neat and organized yet confusing. I probably took 50 photos and then I picked 16 photos that I really liked and that would go with each other. I made the first two rows focusing on her eyes and eyebrows because I think that’s one of the most significant features you have on your face. Then I went in order and did the mid section of her face and then her lips. Before I turned all of the photos black and white all of the photos had different lighting and different amounts of exposure. I liked how it turned out when I put it into black and white because all squares don’t look the same. Each square is different. I wanted to put a white border around it to make it look more functional in a sense where the pictures are easier to define. My favorite thing about this project would have to be how all of the photos are going everywhere but at the end it all makes sense. It reminds me of a puzzle that has all of its puzzle pieces in the wrong place. Overall I enjoyed working on this project and I was glad I got to end the year with a project of my choice.
Environmental Portraits
Studio Portraits
For this project I was excited to take photos, because I felt like a real photographer taking photos of a model. I took Sandra as my model. The photo’s I wanted to capture of Sandra was everyday natural poses/emotions she goes through everyday in her life. For editing the photo’s I didn’t do anything special but I had to put a layer mask on all three of the photos to make the skin color look more realistic and so it can contrast with the lights. Something that was a challenge for this project was making Sandra comfortable with the camera. It took a couple shots before Sandra was able to open up and her emotion came out more natural. In this project I didn’t find anything easy. It took some time to edit the photos and make them the way I wanted them to look like. My models personality is fun, joyful, emotional, funny and much more. It was so much fun taking photos of Sandra during this project because she was comfortable with me and she didn’t feel insecure about herself around me so she was just being herself and I was able to capture that on camera. I also encouraged her to step out of her comfort zone and asked her to be more serious and pretend she’s a real model who’s getting paid. Some advice I would give to someone who is doing this project is that they should talk to their model while their taking photos of them and always give them positive reinforcement.
Double Exposed
For this project I wanted to experiment with all of the photos I took and the tools I used. For my first photo I took a photo of Sandra’s eye and I merged it with 2 other photos, one of the photos that was in her eye was a photo of castle that I took when I went to Spain this summer. The other photo that is beneath her eye was a photo that I took outside of the school on the grass field when it had snowed the night before. In the second photo I combined two different photos together. The concept behind this was to bring two opposites together and making them into one and so they compliment each other. The background of this photo was taken outside of the school when it had snowed and I took it in front of the gym doors. Then the photo of the sunset was taken when I was on a bus in Spain. Then I added a layer mask to the sunset so I can make the sun look bigger. In the third photo I took a portrait of Sandra’s face. The photo that is covering her face is a statue that was in a shape of a man and it was made with the letters of the alphabet. I decided to combine these two photos because I liked the way it spirals around her face and eye. Overall I was proud of the three photo’s that I edited because it was something that was totally new to me and I got to learn a lot about photo shop along the process of it.
Levitation
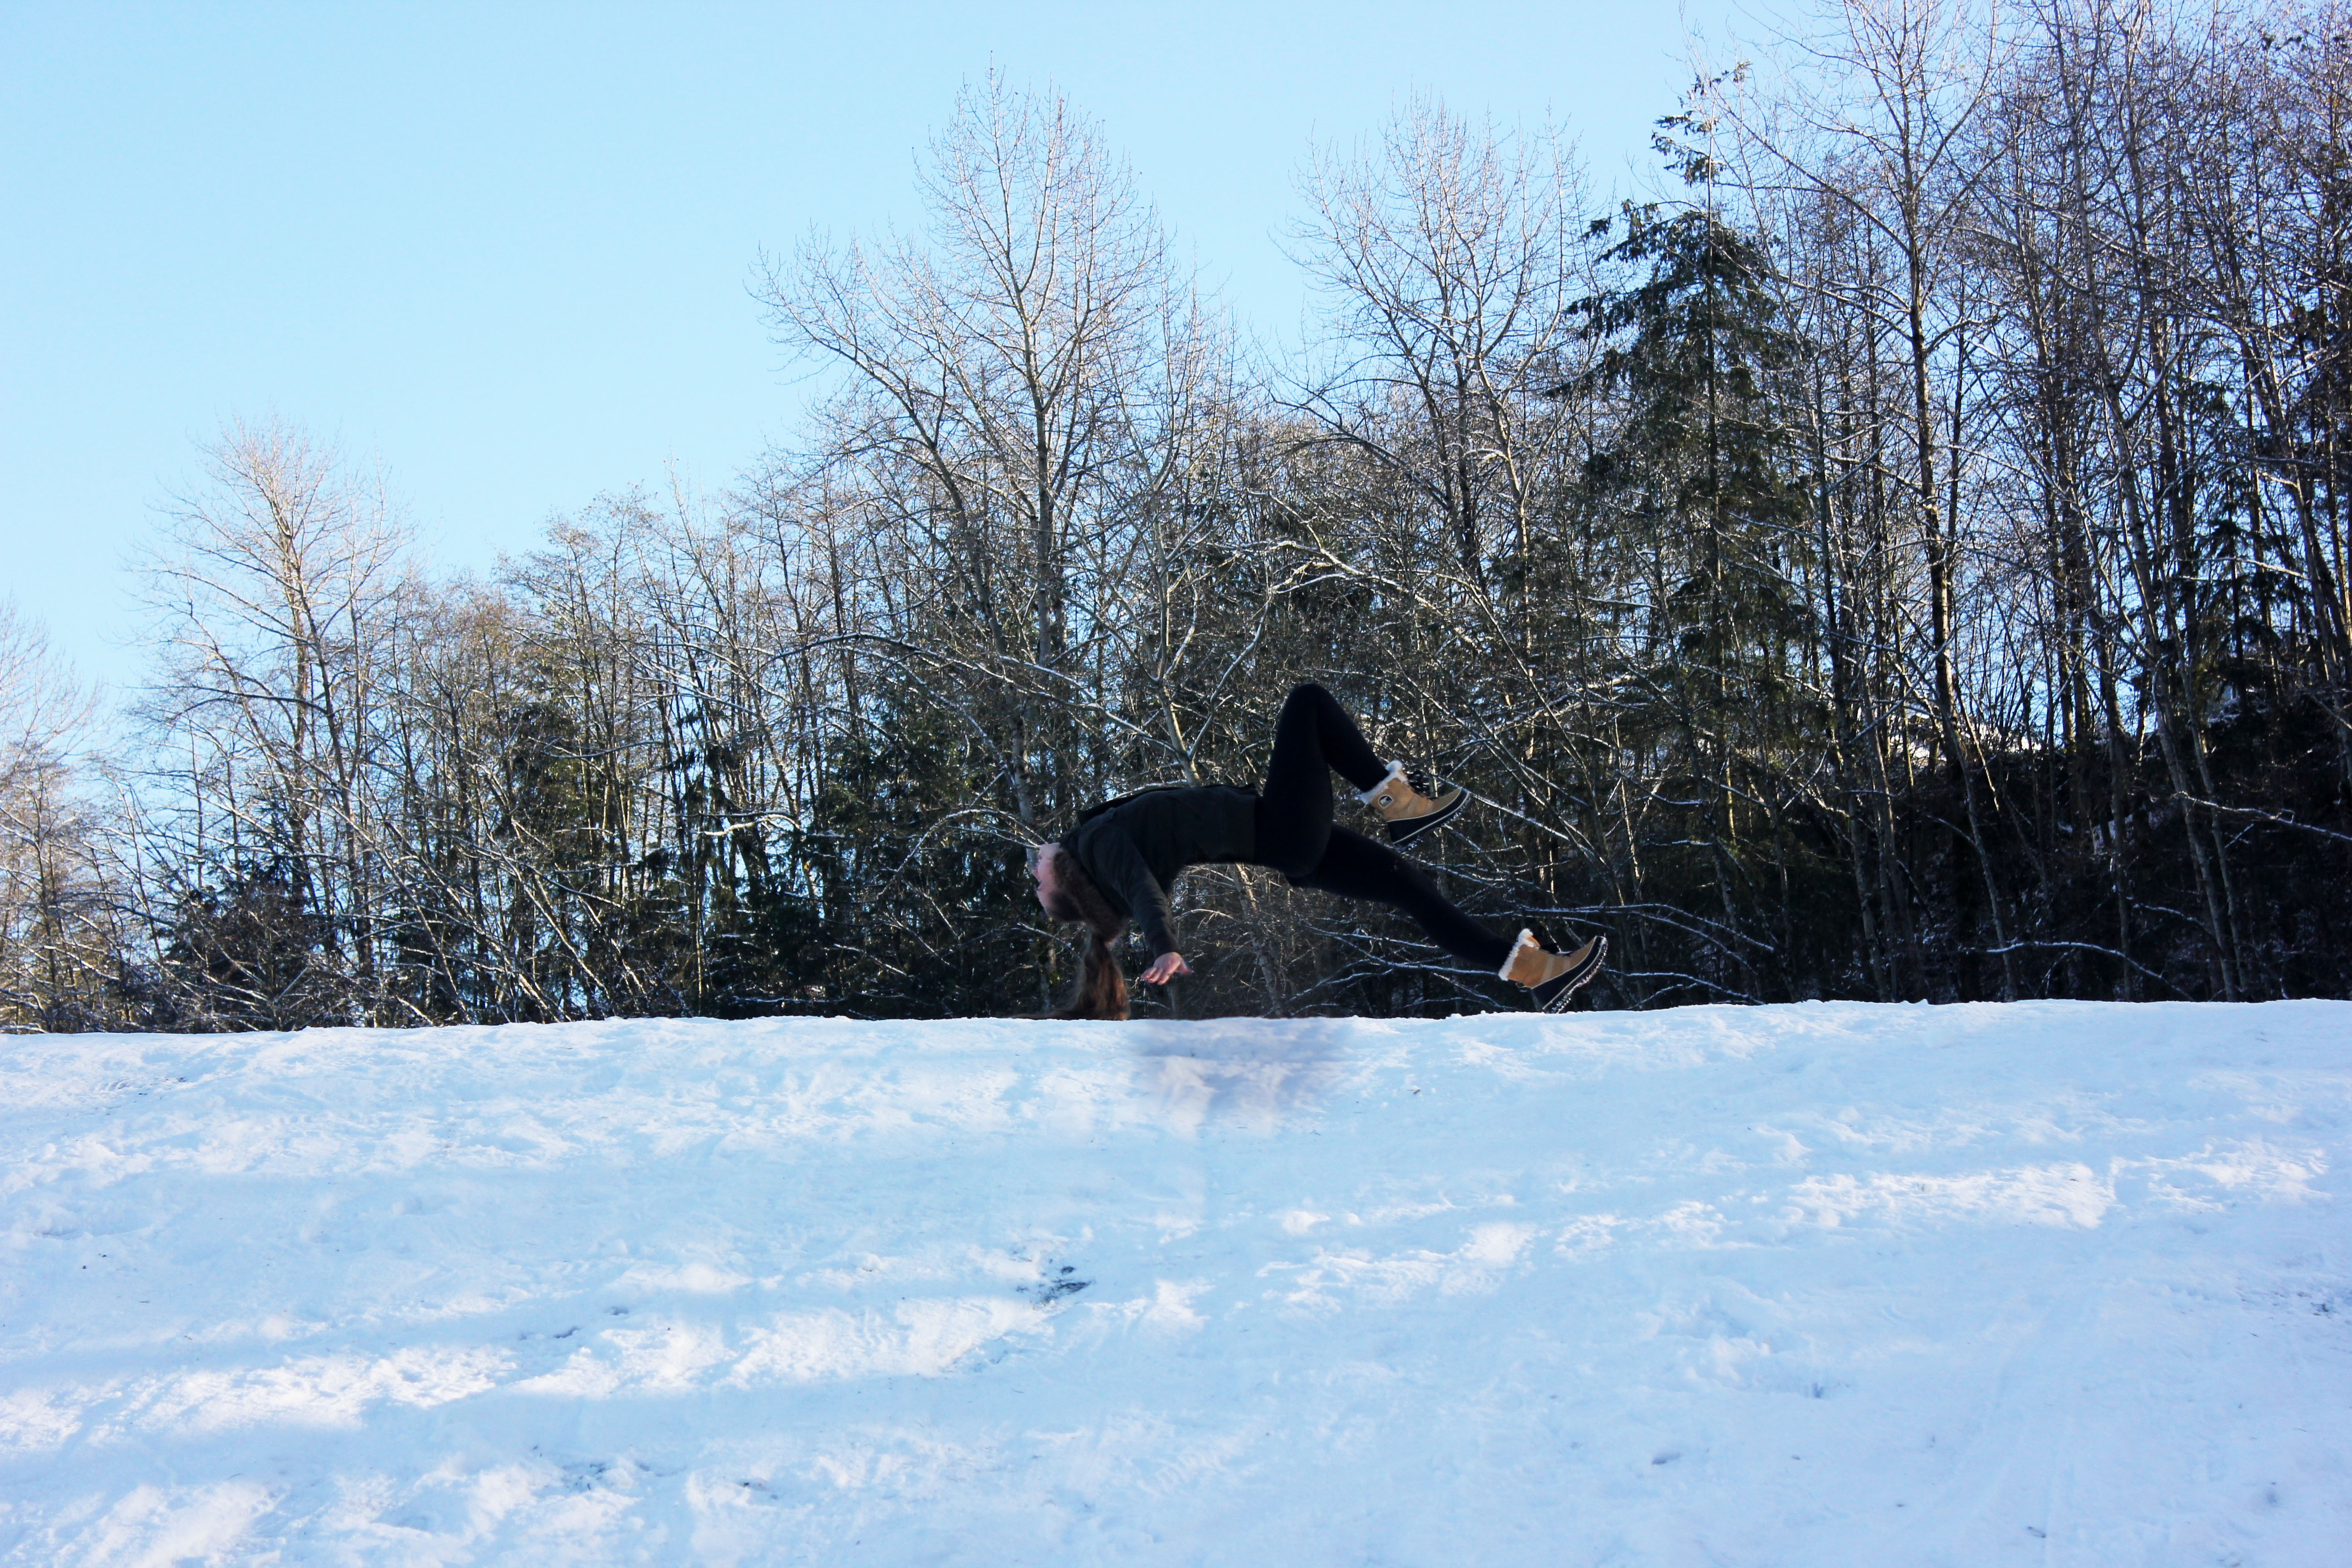
I think this project was the hardest project we have done so far. I think taking the photographs was much harder than editing it in photo shop. I had to do it twice so I was able to do it properly. I took this photo of Megan on top of the hill when it had sn0wed yesterday. I made her lay down o the stool so it looked like she was floating off the ground. I was on the bottom of the hill with the camera on the tripod and when I took a photo of Megan lying down I made her take the stool and leave the shot so I could take the photo of the background. Standing outside in zero degree weather and not wearing gloves I think I had almost died. Every part of this project was so challenging except the part editing it in photo shop. I didn’t edit it much on photo shop because I wanted to keep it natural, all I did was turn up the brightness and contrast and adjusted the curves and I had to add a layer mask so both of the photos would line with each other and then I erased the stool. In this photo I wanted Megan escaping the cold, as you can see she is wearing a big winter jacket with winter boots. I choose to do escape winter because I hate being cold, I like snow but I hate being cold so it was a mix of my 2 things I like and dislike. Overall I really liked how my project turned out because of the snow in the background.
Fall in Vancouver.....
Fall is one of my favorite seasons. I love to capture all of the colorful leaves. My photos that I took for this project I tried to make them all different but relate to each other at the same time. I took all of my photos into photo shop and I edited them. I wanted to make them look realistic, so it looked liked the camera did everything. For all of my photos I mostly used the same editing tools. Some of the most tools that I used on photo shop were curves, brightness and contrast. For my photo for fall that was touch I used a layer mask and made the background completely black/white and made the leaves a warmer tone to stand out in the photo. That was one of my favorite photos that I took for my project and my shallow depth of field. I used one of the aperture lenses to take that photo so I first took some random photos with the lens to get familiar with it. The big idea for my project was colorful. I wanted to use a bunch of leaves with different colors to represent fall. I didn't really think too much while I was taking my photos. I tried to relate my photos to things your come across in your everyday life. After doing this project I have learned so much about photo shop that I didn't know before. Overall I really liked what my end result was with this project, I got to learn more about photo shop.
Me in photos...
|
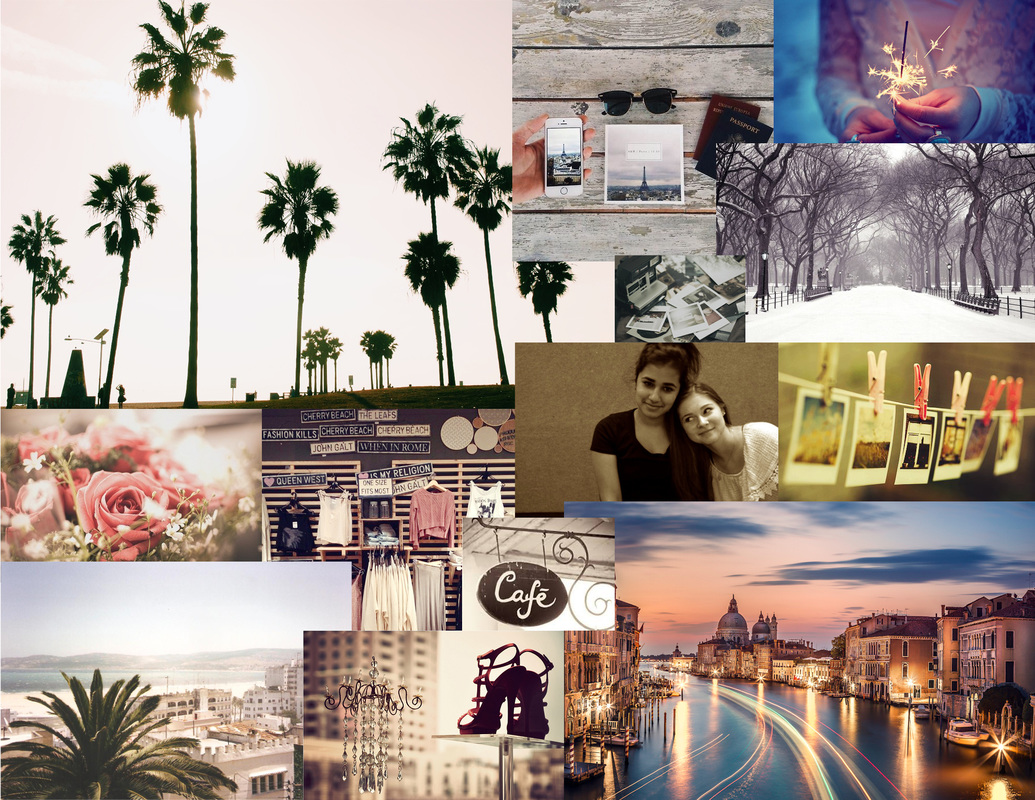
For my college project I wanted to have a theme and I wanted my college to reflect on my personality. The photos I chose relate to each other because all of them represent my likes. In my college I tried to make all of my photos different sizes and over lapping each other. From looking at my college it would pretty easy for someone to recognize what I like.
|
